
Materials:
- Tyvek (plain or painted)
- watered down Mod Podge
- scraps of paper (you can also add fibers)
- colored tissue paper
- brush (wide, so it is easier)
- tape
Steps:
- tape corners of the Tyvek down
- brush watered down Mod Podge over the Tyvek (I'll call it glue from now on)
- place scraps of paper over the glue leaving some of the painted Tyvek showing
- brush over the scraps with the glue
- tear pieces of colored tissue and put them over the whole piece
- brush Mod Podge over the tissue
- let dry
I have not done anything else to it, but it can be painted over, sewn, cut, or embelished further. It is very easy to do and since it has Tyvek as the base, it is quite strong.
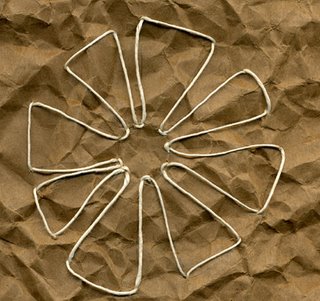
Tissue paper fusion

This is another fusion piece using tissue paper, scraps of paper, glitter glue, freezer paper, and watered down Mod Podge.
- tape the corners of a piece of freezer paper down
- brush the Mod Podge (I'll call it glue from now on) over the freezer paper
- tear pieces of tissue paper and cover the frezer paper with it (I tore pretty big rectangular and square pieces). I used dark colors as the base.
- brush over the tissue paper with the glue
- put down scraps of paper
- brush over the scraps with the glue
- doodle with glittler glue (I drew hearts, but you can do anything... just to give it a bit of sparkle)
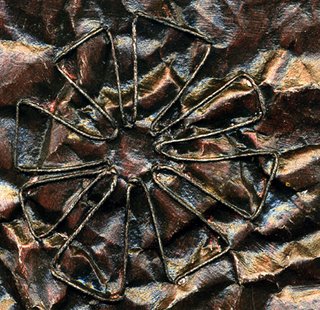
- cover the whole piece with pieces of tissue, brushing over each one as you put it down (this is so you can overlay the tissue paper with other pieces and colors and everything will stick together). Some of the glue may get on your brush and get on top of the tissue paper... this looks really nice too; I have some of it in the top right corner
- I tore two big pieces of a gauzy-like paper with a wavy pattern and placed them in the top left and bottom right corners (again, brushing over them with the glue). This is completely optional, of course, I just thought it might add a bit of texture.
- Let dry (may need to dry overnight), and then peel it off the freezer paper
This is very simple, fun, and you can use all kinds of stuff between the layers (or add more layers). I haven't decided yet what to do with this, for now I'm just enjoying it.


