Thursday, December 10, 2009

Hand Carved Leaves

I hand carved a block which if I print it side by side will continue a sequence of branches and leaves. I so enjoyed carving this block, printing it, and then playing with the different prints!!! Let me know what you think.

Here is the carved block (you will notice that the beginning and ending of the branches are the same distance from the edges so that they can be the continuation of the other if printed in sequence):


Here are some "papers" I printed initially but have not done anything with yet:


And here are some finished works after playing with the prints.


All of these have 3 prints of the hand-carved block in sequence as a base. Some have additional prints on top.

Thursday, March 20, 2008

How many ways are there to display ACEOs?

ACEOs are affordable and collectible miniature works of art. The only specification is the size: 3.5"x2.5" or 8.9cm x 6.4cm.

As a seller and also a collector, I've always looked for different ways to display these little pieces of art. I want to list as many different ways of displaying them, so that other collectors and potential buyers can see how fun it can be to collect and display them.

I have asked my art friends to provide their own pictures and links and hope you enjoy both the ACEOs and the different ways to display them. I will keep adding to this post rather than create new ones, so I can use one link in my listings.
My thanks to all the wonderful art friends who have been so willing to share their ideas. Clicking on the pictures will take you to the contributor's Etsy shop.


1. Display ACEOs on a tiny easel - from martaharvey


2. Create a mini ACEO galery - from readingsully2


3. Display ACEOs in a painted and distressed wooden frame - from Vintagesnapsandscrap


4. Use magnets to display your ACEOs on your refrigerator - from readingsully2
(you can buy a magnetic frame or make your own by attaching a magnet to the back of an ACEO sleeve)


5. Use a mat and frame to display multiple ACEOs - from arteest


6. Display on a windowsill - from chimeracreation


7. Frame and display on the wall with other art - from chimeracreation


8. Place the ACEOs in sleeves and pin the sleeves to a wall or corkboard - from chimeracreation


9. Display in a custom made ACEO box - from readingsully2


10. Display your collection in a binder - from laurali
(You can get 9-pocket acid-free binder sheets from comic book shops)


11. Mat and frame the ACEO in a larger frame - from MoranArtwork


12. Hang on a line with clothes pins - from LittleGreenJellyBean


13. Display in an unlined journal using photo corners - from LittleGreenJellyBean


14.  Get a mat to fit any frame and display a set of ACEOs - from MartaHarvey


Tuesday, February 26, 2008

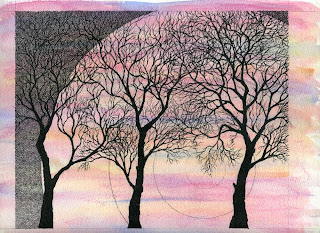
Winter Trees with Watercolor Background

This is my progress through an 8"x10" piece similar to the winter tree ATCs you've seen me do.

Answers to some of the questions I received from you:

  • PAPER: this was done on Arches watercolor paper - rough - 140lb
  • PEN: I used a Koh-i-noor Rapidograph .30 size pen for the pen & ink work
  • TIME: it took me 9 hours to create this piece

My notes: I should have used a smoother paper since the rough watercolor paper was a bit too rough for the pen and ink work. As for the size of the pen, I could have used a larger size for the thicker branches of the trees (or even a brush)... just didn't feel like it - go figure! As for time, this was the first time I actually jotted down how long it took me to create a piece... it was quite an eye opener as I tend to lose track of time when I'm creating; I didn't think it would take this long!


If you have any questions or comments, please feel free to email me.
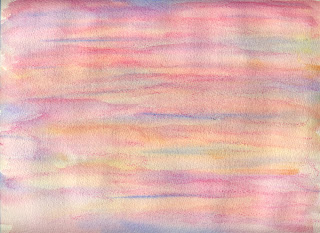


This is the watercolor background that I painted. I wanted a lot of different colors, but wanted them pretty light as I will do a lot of pen and ink work over the watercolors and don't want the overall effect to be too dark. We'll see how it goes :)


I've added the frame of the picture (8"x10") and started drawing in the trees.
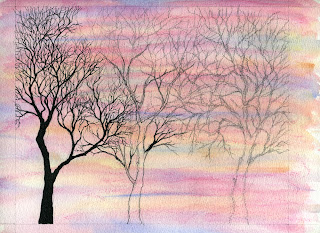


I've started going over the trees with pen and ink. The pencil marks are obviously just a guide for me since my trees seem to take a life of their own and most of the pencil branches are soon forgotten.


Most of the second tree is now done.
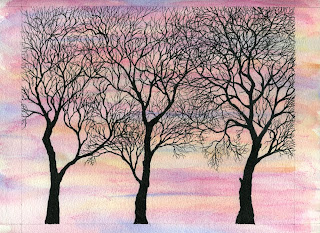


All three trees are now finished.


I have started cross-hatching with the outside circle and will work towards the inner circle so it is easier to see the pencil lines. This darker circle has four layers: horizontal, vertical, and diagonal - both ways.
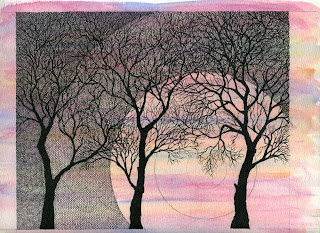


This next circle is lighter as it only has 3 layers: vertical, and diagonal - both ways.

The next circle has only two layers - diagonal from left to right, and right to left.

And this is the finished piece!! The last circle only has one layer - diagonal from left to right.

Tuesday, September 18, 2007

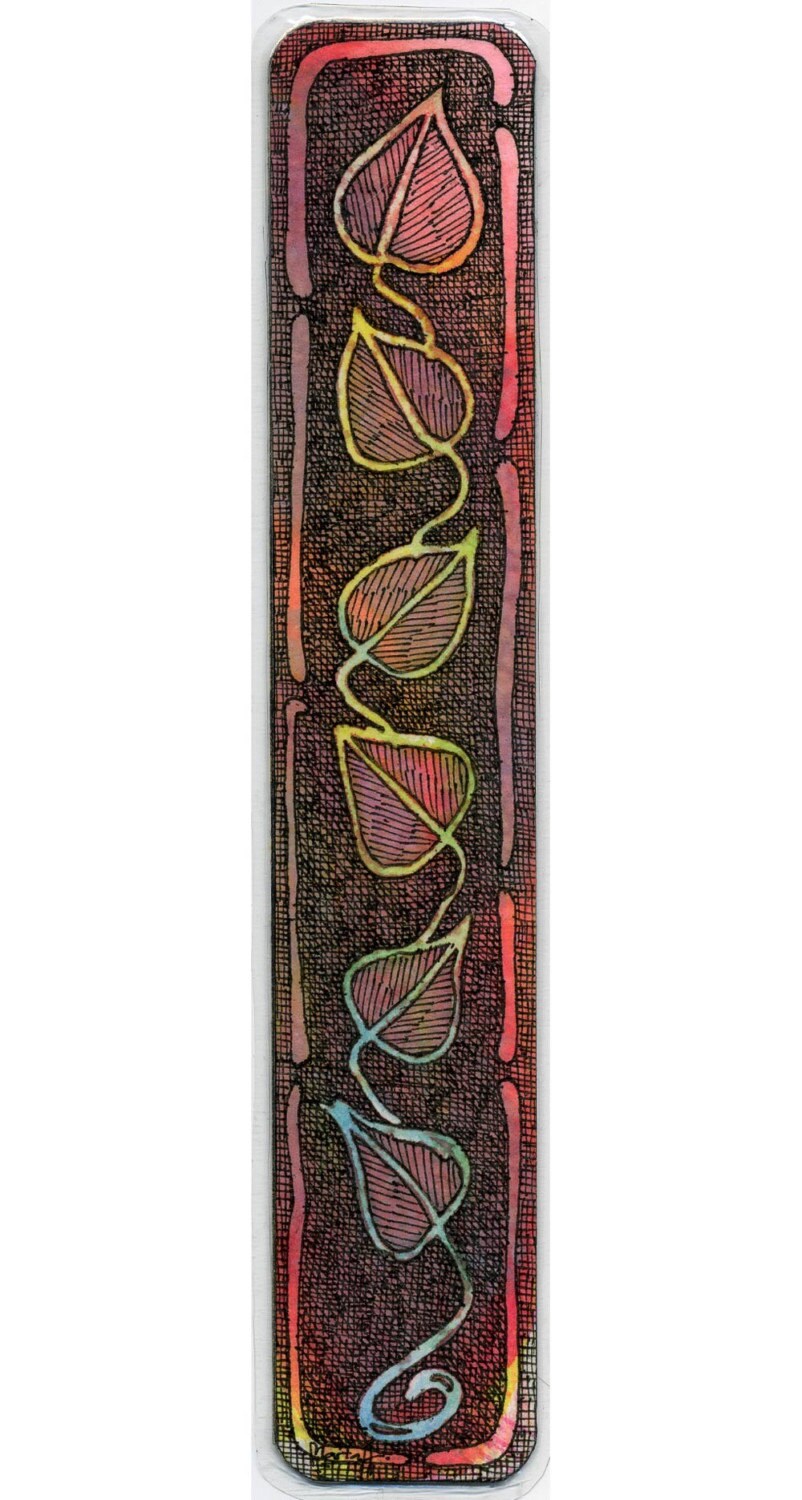
Technique #5: Glaze pen resist

This is quite a fun technique and I love using it. You can use it many different ways with different media... make sure you experiment once you understand how it works.

Materials:
  • Sakura white Glaze pen
  • watercolors (you can use ink also)
  • paper
  • stamp (optional)
  • pen & ink, colored pencils, gel pens, markers, ... something to embelish and finish your piece

Steps:

  1. Add some color to your paper (I used one of my hand-carved stamps printed with watercolors)
  2. Draw over your colored background with the white Sakura Glaze pen (I go over the edges of the designs on the paper, making sure the lines I'm drawing are going over the colored paper - not the white). The pen is "saving" the colors you are going over, as it will dry transparent.

  3. Once the glaze pen ink is dry, go over the entire piece with a glaze of watercolors or ink. This will mute the background and make the lines you drew stand out. You can do as many layers as you want.
  4. Once your piece is dry you can embelish it with additional paint, colored pencils, gel pens, pen and ink.... anything you can think of.
  5. Have fun!!!
    Here is a finished piece (above) and another at the bottom. Both used this technique with watercolors, colored pencils and pen & ink.
I have a couple of pieces using this technique in my Etsy shop if you want to take a look:
I'm also working on a couple of other pieces, one of them (which I'm really enjoying) using iridescent ink. Please post a comment or email me if you are interested in seeing that piece. I can add it to the post once I'm done.

Saturday, July 07, 2007

ATC Workshop - Bernie Berlin's book

I'm taking the ATC Workshop at the Artists of the Round Table yahoo group based on Bernie Berlin's book. I'm having such a wonderful time!!! This is a picture of one of the ATCs I created with the string technique.

We work on 2 or 3 of the techniques each week, create an ATC from one of the techniques, and post to the whole group. It's wonderful to see how everyone will come up with different ideas and interpretations about the same technique.

If you want to follow my progress through the book, I'm posting my backgrounds and ATCs on my picture trail

Comments are always welcomed.

Saturday, June 30, 2007

Technique #4: Painted Deli Paper

I really should not be posting since I have sooooo much to do, but I felt bad about posting the 7 random facts about myself and not give you a technique. So, here it the technique I used for the technique swap for the Art Techniques group.

Materials:
  • deli paper (mine is called "heavy weight interfolded delicatessen paper " brand is WF8)
  • liquid watercolors
  • Shiva paintsticks
  • foam stamp
  • gesso
  • stamping pad

Steps:

  1. Crumple your deli paper into a ball 2 or 3 times
  2. Lay it flat on a protected surface so you don't get watercolors all over your working surface
  3. Squirt 2 or 3 colors of liquid watercolors onto the paper
  4. Squirt water over the paper so the colors start to mix
  5. Crumple your paper again and squeeze tight so you won't get too much white space
  6. Let dry or use a heat gun as you open your paper carefully and slowly
  7. Once dry, rub Shiva Paintsticks (one or two colors) over the paper so it highlights the peaks and valleys
  8. Dab a foam stamp on gesso and stamp your paper randomly
  9. When adhering to another surface, let some of the wrinkes in the paper and highlight them by rubbing a stamping pad over the wrinkles
That's it! Here are some of the ATCs for the technique swap:

Here are some more examples of papers I made using this technique:

I have used this technique for the background of my nephew's present:

Wednesday, January 03, 2007

Technique #3: Model Magic and stamps

This is very simple and I'm only including it here because several people have asked me how a couple of things were made after looking at my picturetrail albums.

Materials:

  • Model Magic by Crayola (I'll call it "clay")
  • powder (I used cornstarch)
  • stamps (I used my own hand-carved stamps)
  • paints (watercolors, acrylics, rub-ons, Pearl-Ex, whatever you have and want to experiment with)

Steps:

Before you begin, I must say that you can't save unused "clay", so make sure you have enough stamps so you can use the entire contents (I got 4 oz. packages).

  1. roll out the Model Magic to the desired thickness
  2. dust the "clay" with the powder
  3. press the stamp on the "clay"
  4. remove carefully
  5. cut or tear around the stamped "clay"
  6. let dry overnight (see picture below)
  7. brush the powder away
  8. paint the "clay". The "clay" in the picture below was painted with watercolors
  9. go over the raised surfaces with metallic rub-ons or a contrasting color (the picture below was painted with watercolors and the raised surfaces with copper metallic rub-ons)
  10. embelish as desired (in the picture below I used Pearl-Ex with diamond glaze to give the heart some color, then sewed around it with metallic thread). If you sew on Model Magic, don't pull the thread too tight or it will cut through the "clay".

Told you it was easy!!! I hope you enjoy it!!

Sunday, December 31, 2006

Technique #2: Fusion papers

Tyvek fusion paper


Materials:
  • Tyvek (plain or painted)
  • watered down Mod Podge
  • scraps of paper (you can also add fibers)
  • colored tissue paper
  • brush (wide, so it is easier)
  • tape

Steps:

  1. tape corners of the Tyvek down
  2. brush watered down Mod Podge over the Tyvek (I'll call it glue from now on)
  3. place scraps of paper over the glue leaving some of the painted Tyvek showing
  4. brush over the scraps with the glue
  5. tear pieces of colored tissue and put them over the whole piece
  6. brush Mod Podge over the tissue
  7. let dry

    I have not done anything else to it, but it can be painted over, sewn, cut, or embelished further. It is very easy to do and since it has Tyvek as the base, it is quite strong.


Tissue paper fusion


This is another fusion piece using tissue paper, scraps of paper, glitter glue, freezer paper, and watered down Mod Podge.

  1. tape the corners of a piece of freezer paper down
  2. brush the Mod Podge (I'll call it glue from now on) over the freezer paper
  3. tear pieces of tissue paper and cover the frezer paper with it (I tore pretty big rectangular and square pieces). I used dark colors as the base.
  4. brush over the tissue paper with the glue
  5. put down scraps of paper
  6. brush over the scraps with the glue
  7. doodle with glittler glue (I drew hearts, but you can do anything... just to give it a bit of sparkle)
  8. cover the whole piece with pieces of tissue, brushing over each one as you put it down (this is so you can overlay the tissue paper with other pieces and colors and everything will stick together). Some of the glue may get on your brush and get on top of the tissue paper... this looks really nice too; I have some of it in the top right corner
  9. I tore two big pieces of a gauzy-like paper with a wavy pattern and placed them in the top left and bottom right corners (again, brushing over them with the glue). This is completely optional, of course, I just thought it might add a bit of texture.
  10. Let dry (may need to dry overnight), and then peel it off the freezer paper

This is very simple, fun, and you can use all kinds of stuff between the layers (or add more layers). I haven't decided yet what to do with this, for now I'm just enjoying it.

Monday, November 27, 2006

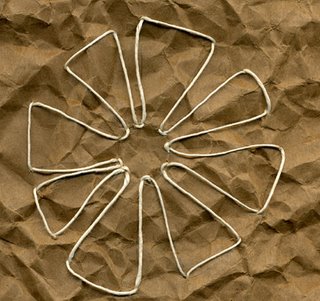
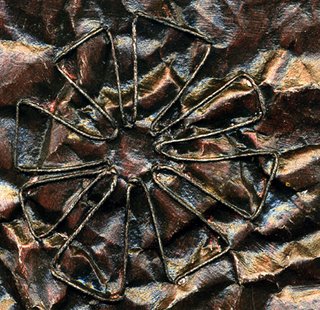
Technique #1: Crumpled and sewn brown paper

Materials:

  • brown paper (from brown paper bag)
  • string, thread, or hemp
  • needle
  • pin, needle, or awl (to punch holes)
  • gesso
  • 2 colors of acrylic paint
  • metallic rub-ons or metallic stamp ink pad
Steps:

    1. Draw a simple design on a piece of brown paper
    2. Crumple paper 2 or 3 times
    3. Punch holes along the design
    4. Sew design
    5. Cover paper and string with a thin layer of gesso
    6. Once dry, paint over the gesso with one of your acrylic paints (I used Lumiere Supper Copper here)
    7. Once dry, paint over with another color and rub off some of it, so you can see the paint underneath (I used black)
    8. When the acrylic paint is dry, use some rub-ons or a stamp ink pad, and rub over the raised areas (string and some of the "hills" in the paper)

      These are two of my experiments. The one on the left is the one shown in the technique steps. The one on the right was my first experiment and it also includes dryer sheets (on the upper left and in the middle of the flower).