Wednesday, January 03, 2007

Technique #3: Model Magic and stamps

This is very simple and I'm only including it here because several people have asked me how a couple of things were made after looking at my picturetrail albums.

Materials:

  • Model Magic by Crayola (I'll call it "clay")
  • powder (I used cornstarch)
  • stamps (I used my own hand-carved stamps)
  • paints (watercolors, acrylics, rub-ons, Pearl-Ex, whatever you have and want to experiment with)

Steps:

Before you begin, I must say that you can't save unused "clay", so make sure you have enough stamps so you can use the entire contents (I got 4 oz. packages).

  1. roll out the Model Magic to the desired thickness
  2. dust the "clay" with the powder
  3. press the stamp on the "clay"
  4. remove carefully
  5. cut or tear around the stamped "clay"
  6. let dry overnight (see picture below)
  7. brush the powder away
  8. paint the "clay". The "clay" in the picture below was painted with watercolors
  9. go over the raised surfaces with metallic rub-ons or a contrasting color (the picture below was painted with watercolors and the raised surfaces with copper metallic rub-ons)
  10. embelish as desired (in the picture below I used Pearl-Ex with diamond glaze to give the heart some color, then sewed around it with metallic thread). If you sew on Model Magic, don't pull the thread too tight or it will cut through the "clay".

Told you it was easy!!! I hope you enjoy it!!

Sunday, December 31, 2006

Technique #2: Fusion papers

Tyvek fusion paper


Materials:
  • Tyvek (plain or painted)
  • watered down Mod Podge
  • scraps of paper (you can also add fibers)
  • colored tissue paper
  • brush (wide, so it is easier)
  • tape

Steps:

  1. tape corners of the Tyvek down
  2. brush watered down Mod Podge over the Tyvek (I'll call it glue from now on)
  3. place scraps of paper over the glue leaving some of the painted Tyvek showing
  4. brush over the scraps with the glue
  5. tear pieces of colored tissue and put them over the whole piece
  6. brush Mod Podge over the tissue
  7. let dry

    I have not done anything else to it, but it can be painted over, sewn, cut, or embelished further. It is very easy to do and since it has Tyvek as the base, it is quite strong.


Tissue paper fusion


This is another fusion piece using tissue paper, scraps of paper, glitter glue, freezer paper, and watered down Mod Podge.

  1. tape the corners of a piece of freezer paper down
  2. brush the Mod Podge (I'll call it glue from now on) over the freezer paper
  3. tear pieces of tissue paper and cover the frezer paper with it (I tore pretty big rectangular and square pieces). I used dark colors as the base.
  4. brush over the tissue paper with the glue
  5. put down scraps of paper
  6. brush over the scraps with the glue
  7. doodle with glittler glue (I drew hearts, but you can do anything... just to give it a bit of sparkle)
  8. cover the whole piece with pieces of tissue, brushing over each one as you put it down (this is so you can overlay the tissue paper with other pieces and colors and everything will stick together). Some of the glue may get on your brush and get on top of the tissue paper... this looks really nice too; I have some of it in the top right corner
  9. I tore two big pieces of a gauzy-like paper with a wavy pattern and placed them in the top left and bottom right corners (again, brushing over them with the glue). This is completely optional, of course, I just thought it might add a bit of texture.
  10. Let dry (may need to dry overnight), and then peel it off the freezer paper

This is very simple, fun, and you can use all kinds of stuff between the layers (or add more layers). I haven't decided yet what to do with this, for now I'm just enjoying it.

Monday, November 27, 2006

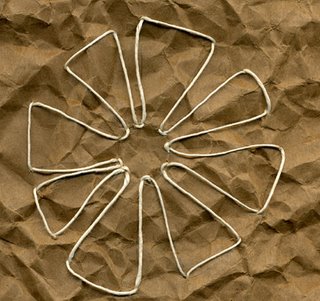
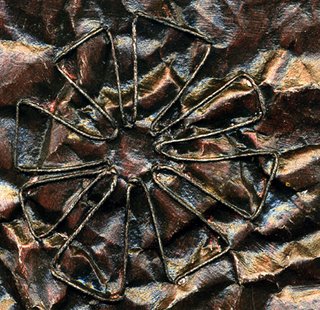
Technique #1: Crumpled and sewn brown paper

Materials:

  • brown paper (from brown paper bag)
  • string, thread, or hemp
  • needle
  • pin, needle, or awl (to punch holes)
  • gesso
  • 2 colors of acrylic paint
  • metallic rub-ons or metallic stamp ink pad
Steps:

    1. Draw a simple design on a piece of brown paper
    2. Crumple paper 2 or 3 times
    3. Punch holes along the design
    4. Sew design
    5. Cover paper and string with a thin layer of gesso
    6. Once dry, paint over the gesso with one of your acrylic paints (I used Lumiere Supper Copper here)
    7. Once dry, paint over with another color and rub off some of it, so you can see the paint underneath (I used black)
    8. When the acrylic paint is dry, use some rub-ons or a stamp ink pad, and rub over the raised areas (string and some of the "hills" in the paper)

      These are two of my experiments. The one on the left is the one shown in the technique steps. The one on the right was my first experiment and it also includes dryer sheets (on the upper left and in the middle of the flower).